Getting Started with Trezor Wallet: Your Ultimate Guide to Trezor.io/Start
In the ever-evolving world of cryptocurrency, securing your digital assets is paramount. Enter Trezor, one of the pioneering hardware wallets designed to keep your crypto safe from online threats. If you're new to this, Trezor.io/start serves as the gateway to setting up your device seamlessly. This article dives deep into everything you need to know about initiating your Trezor journey, from unboxing to secure transactions. Whether you're a beginner or seasoned investor, understanding the setup process ensures your funds remain protected in an increasingly volatile market.
Why Choose Trezor for Your Crypto Security?
Trezor hardware wallets stand out for their robust security features and user-friendly interface. Unlike software wallets that are vulnerable to malware and phishing attacks, Trezor keeps your private keys offline, making it nearly impossible for hackers to access them remotely. Developed by SatoshiLabs, Trezor has been a trusted name since 2014, supporting over 1,000 cryptocurrencies including Bitcoin, Ethereum, and various altcoins.
The primary advantage is the emphasis on self-custody. You control your keys, adhering to the crypto mantra "not your keys, not your coins." Additionally, Trezor's open-source firmware allows for community audits, enhancing transparency and trust. For those concerned about regulations, Trezor complies with global standards while prioritizing user privacy—no KYC required for basic usage.

calibraint.comTrezor Cryptocurrency Wallet Review: Is it Right for You?
Navigating to Trezor.io/Start: The First Step
To begin, visit the official website at trezor.io/start. This page congratulates you on your new device and guides you toward downloading Trezor Suite, the companion app for managing your wallet. Ensure you're on the legitimate site to avoid phishing scams—always check for the secure HTTPS protocol and correct domain spelling.
Trezor offers models like the Model One, Safe 3, and Safe 7, each catering to different needs. The Model One is budget-friendly for starters, while the Safe series provides advanced features like Shamir Backup for enhanced recovery options. Whichever you choose, the setup process is similar and takes about 15-20 minutes.
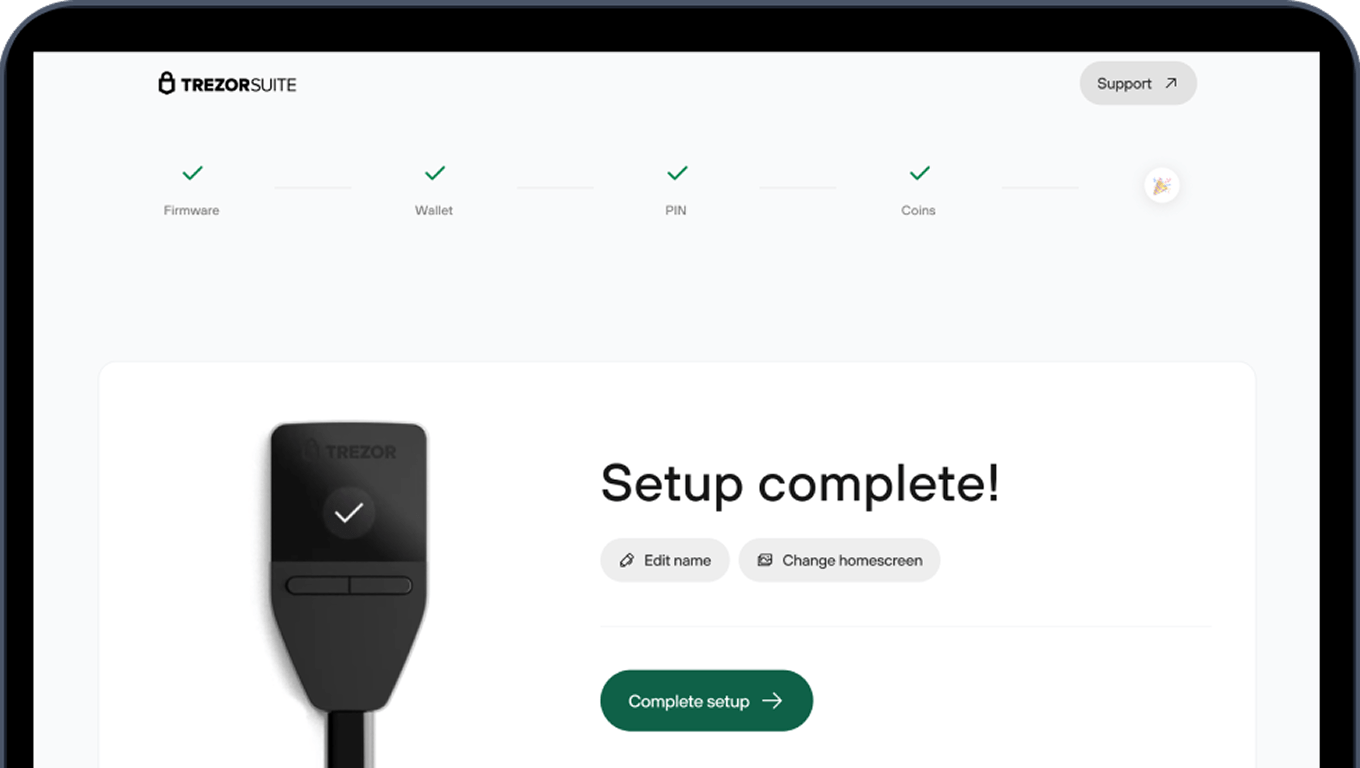
Step-by-Step Setup Guide for Your Trezor Device
Let's break down the installation process into manageable steps. This guide assumes you have a new Trezor device, a computer (Windows, macOS, or Linux), and a stable internet connection.
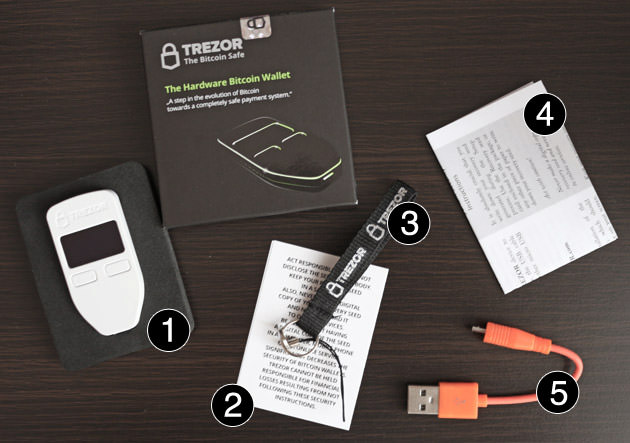
- Unbox and Connect Your Device: Open your Trezor package, which includes the hardware wallet, USB cable, recovery seed cards, and stickers. Connect the device to your computer using the provided cable. Your Trezor will light up, indicating it's ready.
- Download and Install Trezor Suite: Head to trezor.io/start and download the Trezor Suite app for your operating system. Install it following the on-screen prompts. Launch the app, and it will detect your connected device automatically.
trezor.ioWhat Is a Hardware Wallet? A Simple Guide to Keeping Your Crypto ...
- Firmware Installation: If your device is new, it may lack firmware. Trezor Suite will prompt you to install the latest version. This step is crucial as it enables all security features. Confirm the installation on your device's screen to prevent man-in-the-middle attacks.
- Create a New Wallet: Once firmware is installed, choose to create a new wallet. The device will generate a 12 or 24-word recovery seed (depending on the model). Write this down on the provided cards—never store it digitally or share it. This seed is your backup; lose it, and you lose access to your funds.
- Set Up PIN and Passphrase: Enter a PIN on your device (not on the computer) for added security. Optionally, enable a passphrase for an extra layer of protection, creating a "hidden wallet."
- Backup Verification: Trezor will ask you to verify a few words from your seed. This ensures you've recorded it correctly.
- Add Cryptocurrencies: In Trezor Suite, enable the coins you want to manage. You can now receive funds by generating addresses or send transactions by confirming on the device.
For specific models like the Trezor Safe 3, the process includes additional secure element checks for tamper resistance. If you're setting up a Model One, focus on the basic firmware and seed creation.
Key Security Features of Trezor
Trezor's security is its selling point. The device uses a secure chip to isolate private keys, ensuring they're never exposed to the internet. Features like PIN protection, recovery seed, and two-factor authentication integration make it resilient against brute-force attacks.
Moreover, Trezor supports passphrase-protected wallets, allowing multiple accounts under one device. In case of loss or theft, you can recover your wallet on a new Trezor using the seed without compromising security. Regular firmware updates address emerging threats, and the open-source nature invites scrutiny from experts worldwide.
hongkiat.comHow to Setup TREZOR Wallet (For First-timers) - Hongkiat
Essential Tips for Safe Usage and Common Pitfalls
To maximize security, always buy Trezor from official sources or authorized resellers to avoid tampered devices. During setup, perform it in a private environment—avoid public Wi-Fi. Double-check URLs and app signatures to prevent downloading malicious software.
Regularly update Trezor Suite and firmware. Store your recovery seed in a fireproof, waterproof safe, split across locations if using Shamir Backup. Never enter your seed on any website or app; legitimate recoveries happen offline.
If you're integrating with third-party apps, use Trezor's compatibility with wallets like Exodus or MetaMask cautiously, always verifying transactions on the device. For advanced users, explore Trezor's password manager or U2F authentication features.
Conclusion: Empower Your Crypto Journey with Trezor
Setting up via Trezor.io/start is straightforward yet empowers you with top-tier security. In a landscape where hacks make headlines, owning a hardware wallet like Trezor is a smart investment. By following this guide, you're not just storing crypto; you're safeguarding your financial future.